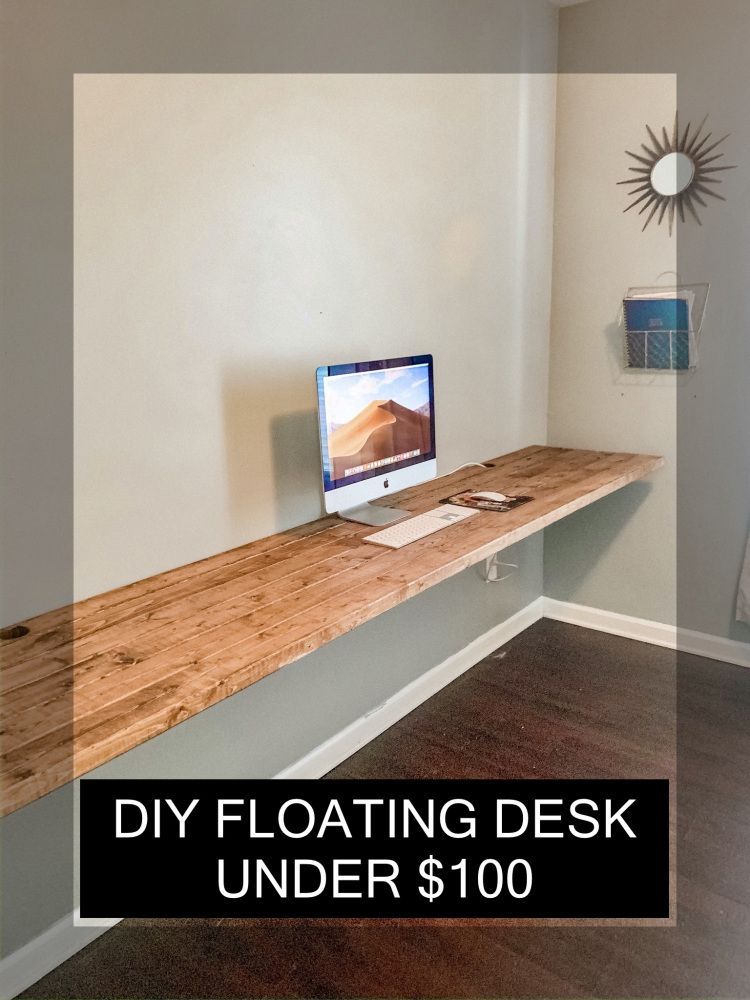
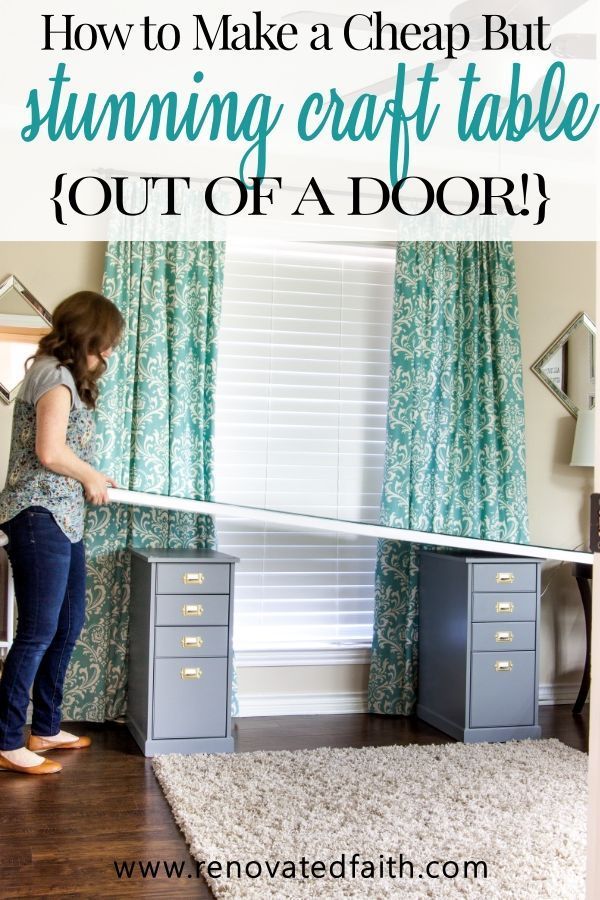
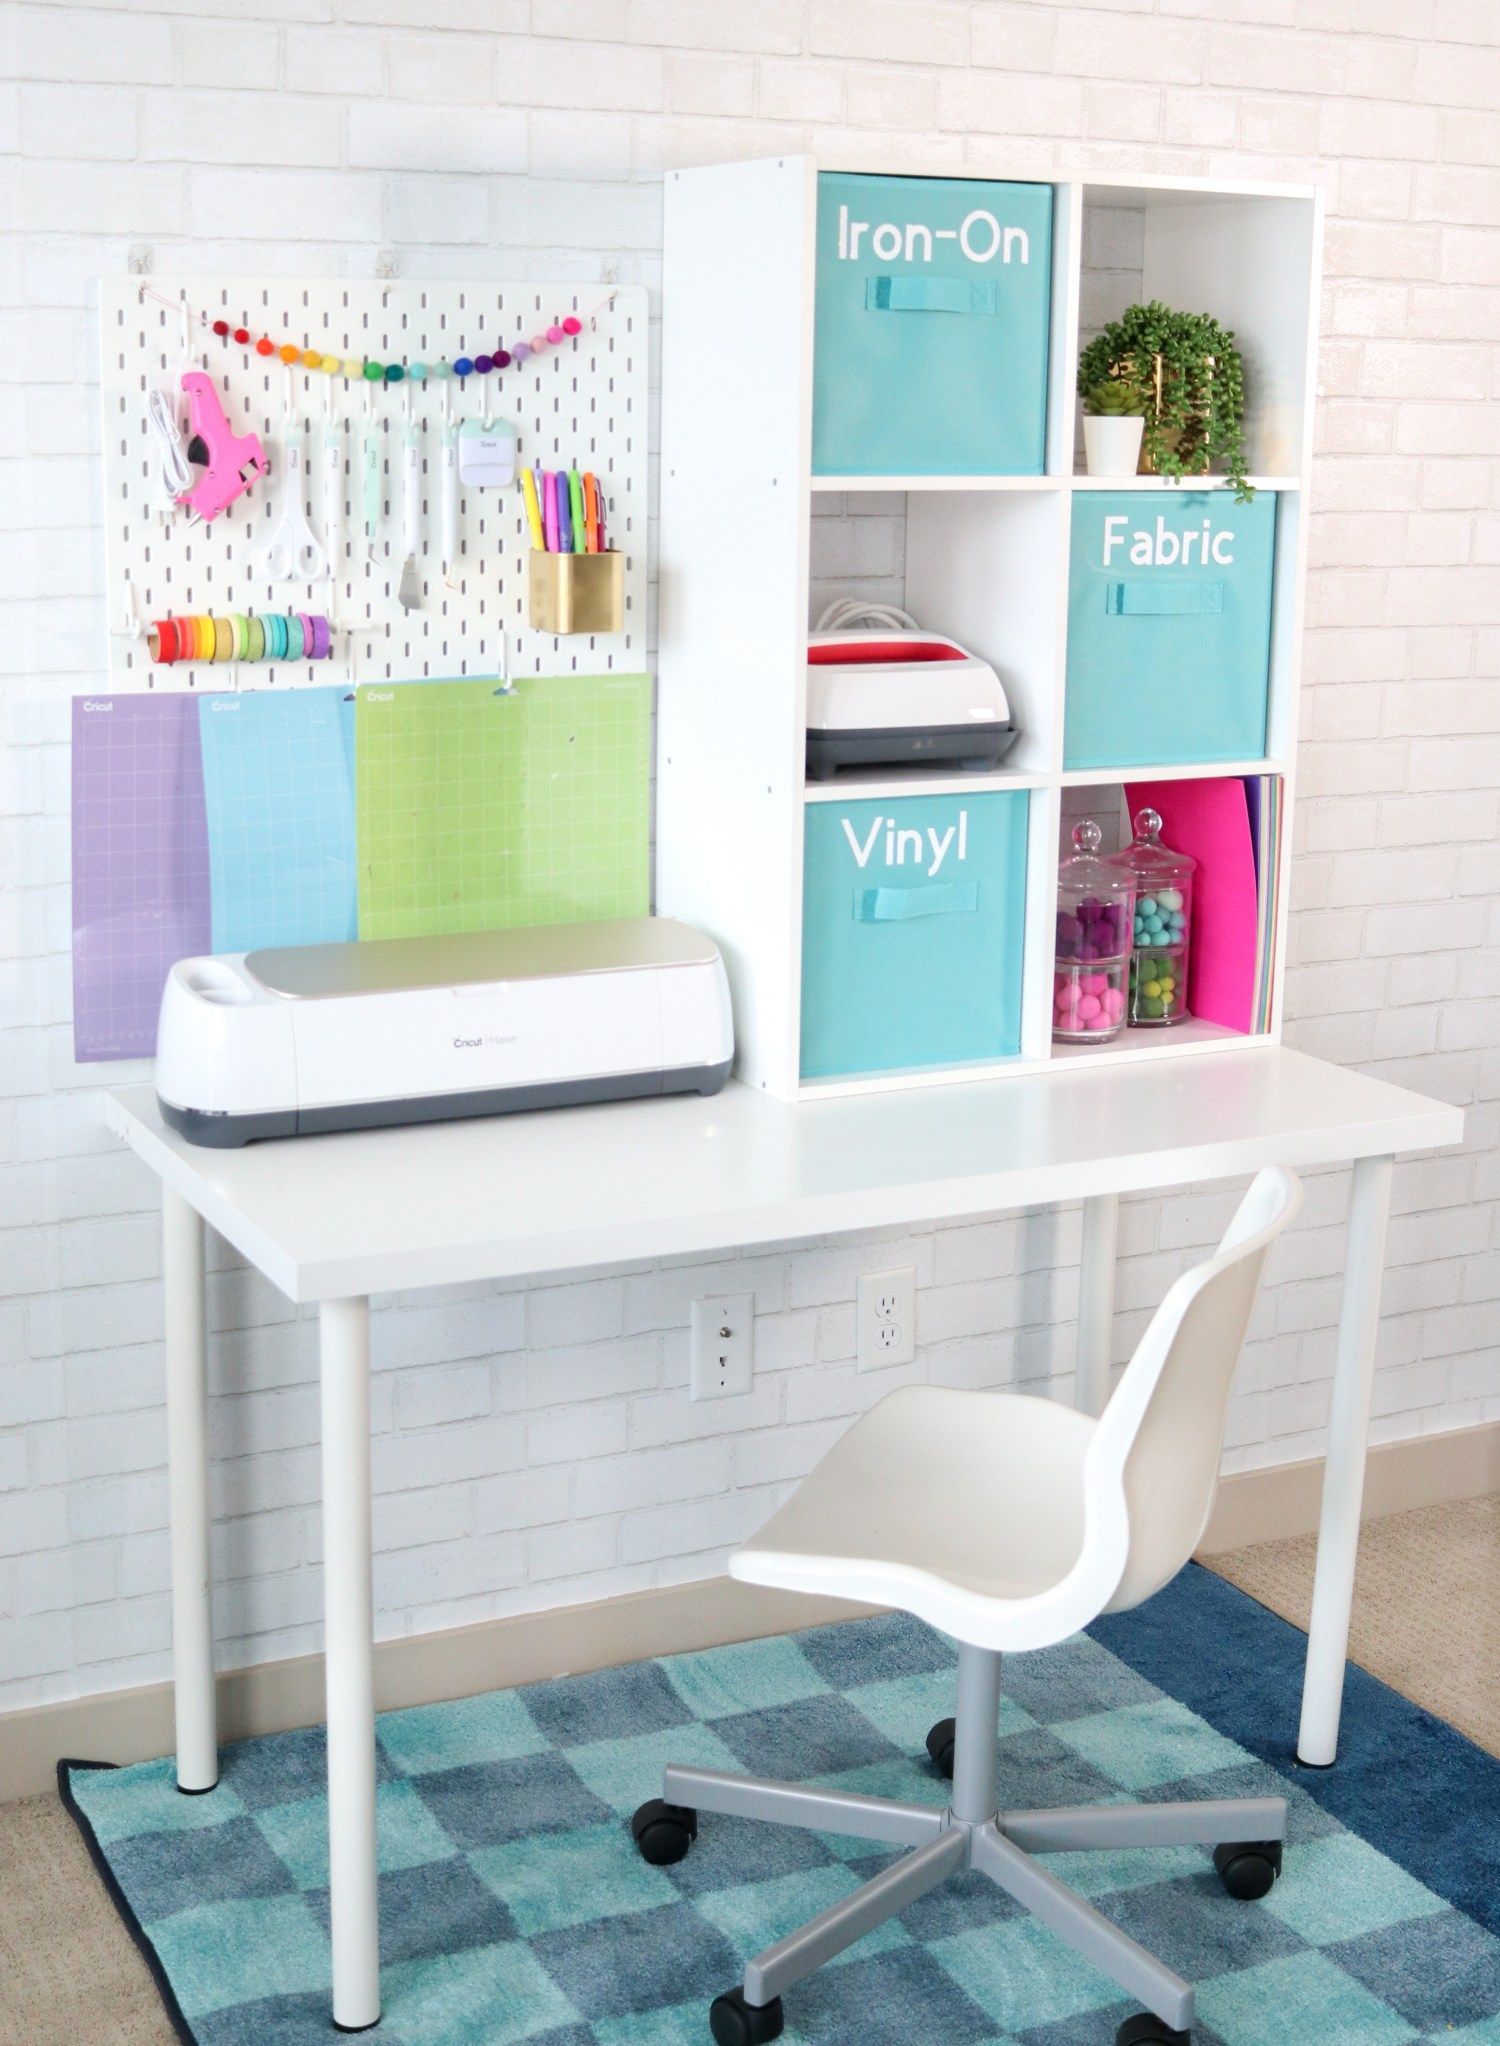
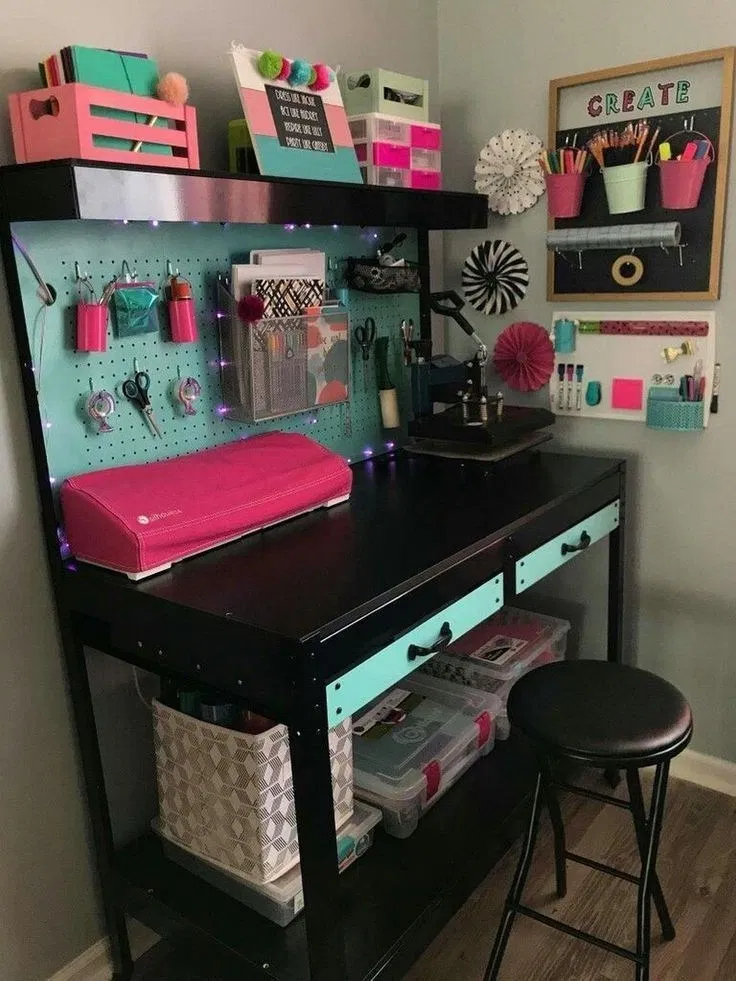
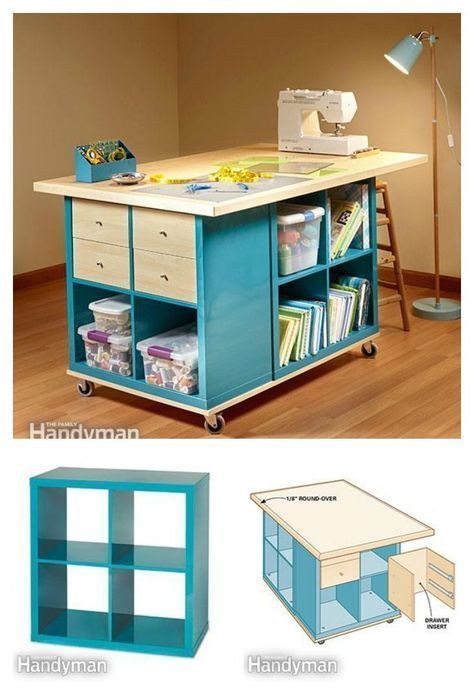
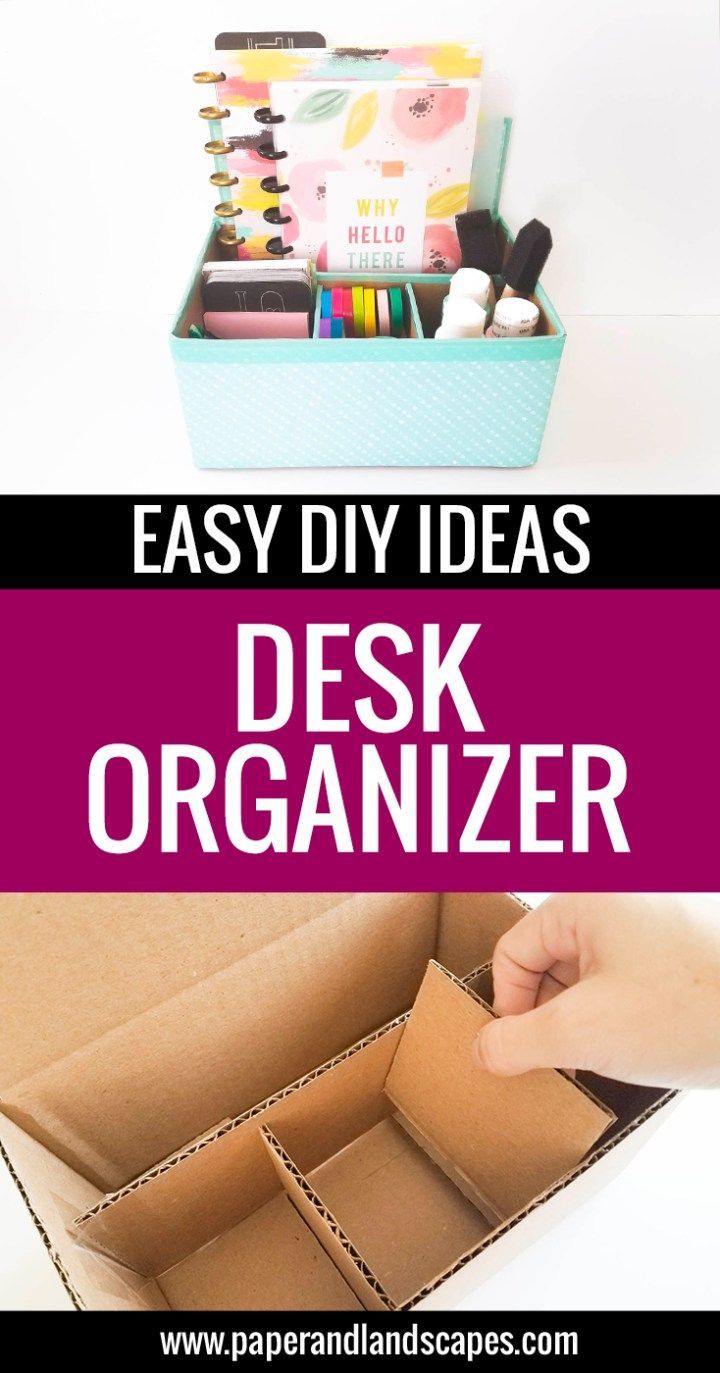
15 diy Crafts desk ideas
Page 6 of 15
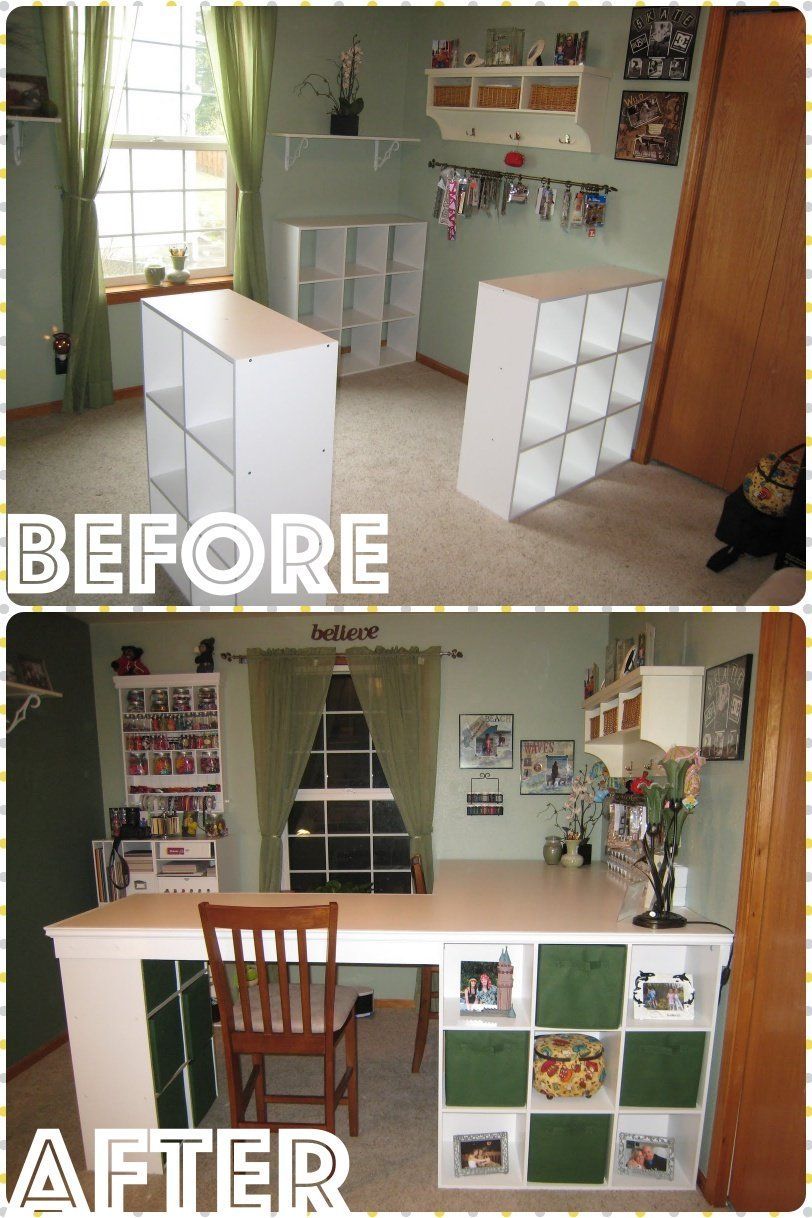
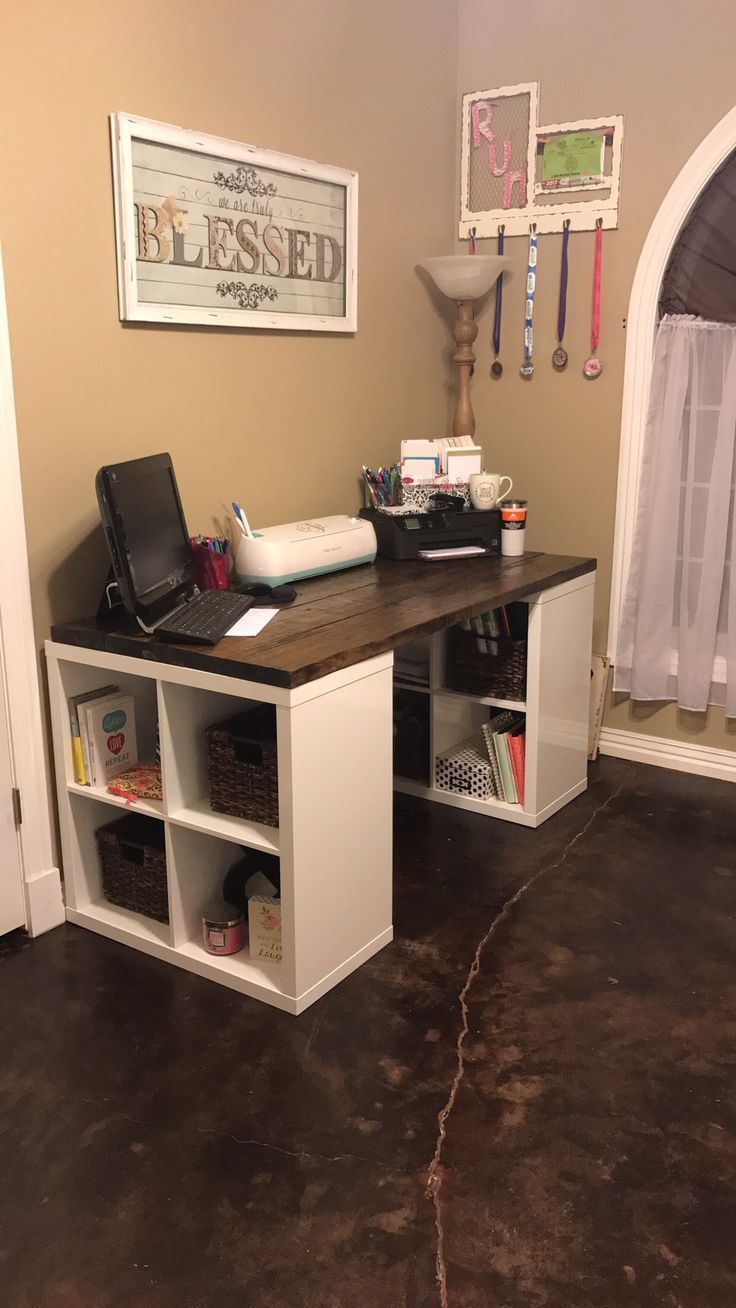
DIY Craft Room Table

via: 24cottonwoodlane.com
Easy DIY craft room desk made from an old door and 9 cube shelving unit. Perfect to spread out and create. I have been wanting a big work space for crafts and projects for the longest time. I had originally bought a second hand desk off of Kijiji which was okay but didn’t have the space I needed to spread out big projects. In fact, I actually had no craft room at all for the first year in this house…just a desk and a space for junk and clutter to accumulate. Can’t believe I’m even going to show this before picture….be kind in your judgments. [AdSense-B] It’s not that I wasn’t doing crafty things but I had no real work space so everything wound up on the kitchen table. In effort to clear up the clutter I donated that old desk to my favorite thrift store and tried to figure out how to create a space that would have both storage for all my things and a big enough work area. All part of my master plan to get the basement area cleaned and ready for a playroom. I considered all sorts of things….cabinets with a counter top, looking for an old kitchen table, or a plain old desk with no hutch on top. Bottom line, none of these things appealed and there wasn’t really a budget for new furniture. Cue Bibles for Missions once again. So I’m wandering around in there one afternoon when I see a room that I’ve never noticed before. It’s full of old doors and windows. Brainstorm!!! Aren’t doors flat? And sturdy? Maybe I could make an old door into a craft table? In point of fact, most of the doors were not flat and had holes from where the handle had been. I poked through tons of doors until I found an old pocket door for $20. Then I dragged that sucker home where it sat for another few weeks until I could find time to work on it and to figure out how to make it into a desk. Now you can’t see it from that picture but behind the door is a nine cube storage unit full of craft stuff. And….I had two extras in the cold cellar waiting for me to put them together. I was originally going to use them in the future playroom but they were the perfect height for a work table. I don’t actually sit when I’m working on something and with the open storage areas for easy access, these made a terrific base for the table. I cleaned the old door with TSP (Lordy, it was filthy!) and gave it a couple of coats with primer before painting it with the same semi-gloss white paint I had used on the trim in the rest of the house. Once it was dry, I plopped it on top of the storage units. And we have a work table! I haven’t actually attached the table to the units. I considered gluing it to the pieces but I wanted it to be easy to take apart in case I ever needed to move it. Then I thought about adding some velcro but I never got back to it. And it’s turned out to be pretty sturdy without being attached. For now. Now I just need to organize and sort the rest of the crafty stuff. Because, let’s be honest….the table only looked that tidy for less than a day. //